Showing readers your blog in the new Dynamic View templates

/ Saturday, April 30, 2011 /
It's easy to let readers see your blog using the new dynamic views / templates.  But there are some consequences.

What are the dynamic templates?

Template Flowers2In April 2011, Blogger announced:
" ... five new dynamic templates ... that you’ll soon be able to customize and use for your blog."

The post below is what I wrote then.    Some of the information is now out of date - for example you can now add a limited range of gadgets to dynamic-view templates, and you can choose them as a default.   You have control over colours etc the same as normal templates.    And Yoga on Southern Speakers has published a lot of ways you can use CSS rules to tweak dynamic templates.

But I am keeping the original content below, because the linking technique is useful for people who don't want to have a dynamic template all the time.


Original Post content:

I'll write more about what these are/aren't later on.   But for now, people want to know how to use them.

Applying the dynamic views to your blog:

Right now, there is no way to make any of the new dynamic templates the default opening view for your blog:  your blog still opens to the home page that you used, which in most cases shows the entire contents of your post recent post.

This may change, as Google works out how people want to use Blogger.   But in the meantime you can, very easily, give your readers a way to switch into any of the default views.

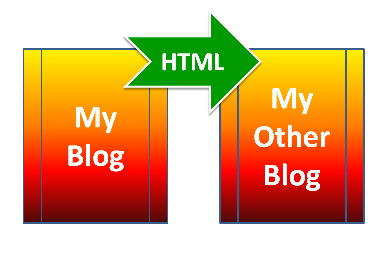
In short, just put some text that links to  
http://www.YOUR-BLOGS-URL/view 
into a place that your visitor can click on - and of course make sure that your blog meets the other conditions (ie public, feeds enabled, views not disabled) .

To give your readers more options, you could have five different links, similar to what I've done here:

In this option the links are to:
Flipcard http://www.YOUR-BLOGS-URL/view/flipcard
Mosaic http://www.YOUR-BLOGS-URL/view/mosaic
Sidebar http://www.YOUR-BLOGS-URL/view/sidebar
Snapshot http://www.YOUR-BLOGS-URL/view/snapshot
Timeslide http://www.YOUR-BLOGS-URL/view/timeslide

I've done fancy things to format the links as buttons (will explain how to do that in another article).  But there are lots of possibilities:  you could just make the links plain text in a row, or even put them into a link-list gadget.

Consequences:

If you let people look at your blog in a dynamic view, there are restrictions that they will face. These may not be a problem, depending on your niche and how important a customized-look-and-feel and right-up-to-date news is for your audience.  But you do need to think about:

Displays and Monetization:
Initially, you cannot customise the way that the dynamic template look at all:
  • Fonts, colours, item placement - everything is based on the standard template
  • None of the widget that are on you blog are included
  • None of your "static" pages are shown
  • None of your advertisements are shown:  this includes AdSense ads that are embedded right inside blog-posts.
  • Some of the view templates are very visual:  the reader is shown a page of pictures, and each page represents one post.   Currently you don't have ANY control over which picture Blogger uses to represent your posts on these displays.

Search Results
Most (all?) of the dynamic templates have a search-function built into them, and some let you search by Label or Post-date too.

However Blogger have said that the search-results are limited to posts that are shown on the screen at the time the search is done.   So if a viewer has a slow connection, or is impatient, the search will not include a lot of your posts.

Even if your readers have a fast connection, I'm pretty sure that the search only looks at posts that are currently in your RSS "feed".   The last time I looked, this was limited to 512kb (or was it 524kB) - something like that).  If your blog's feed is set to "full" and you have some large pictures in your blog, this may mean that only a small proportion of your overall posts are available to be searched.
 .
Internal navigation:
When you're looking at a blog in a dynamic template, clicking on any post-title takes you to a view of that post in the current dynamic template.   But clicking on an in-post link to another post title (eg a link like how to display a powerpoint presentation inside your blog as a slideshow) opens the post in a new window using the "standard" template that you have set up for your blog.

Statistics:
Currently, most statistics-gathering tools (eg Google Analytics) are put onto your blog either by changing the blog-template, or by installing some code into a widget.   Either way, the statistics tool code will not run, so you will not get any statistics about people who view your blog using the new templates.

(NB  I haven't tested this, but I'm 99% certain that it's correct).

Other consequences:
Dynamic template are a brand new feature.   There will be issues that I haven't considered yet.   I'd love to hear your thoughts about the templates and the challenges that we face in adapting to this new way that Blogger may start working.


Related Articles: 


Introducing Dynamic Views in Blogger

Showing a PowerPoint presentation as a slide-show inside your blog

Choosng the colours in your blog,

Putting AdSense ads right inside your blog-posts.

Setting the home page on your blog

Google Analytics and your blog

Putting Adsense ads inside Blogger posts

/ Friday, April 29, 2011 /
This article looks at how to place AdSense ad units right inside Posts or Pages on a Blogspot blog.


Background:

Once you have signed up for AdSense, you can easily put Adsense ads into blogs.  Blogger has options that let you place ads gadgets in the page template, without seeing any HTML code.  Ads may be placed in the sidebar(s) and in the footer of each post.

But there are limitations to this, and sometimes ads in your sidebar aren't the best approach, because readers easily become "ad-blind" and ignore them.


A Better Approach?

To make it more likely that readers will see your ads, you may want to put them into the body of your posts, as I have done underneath this paragraph.


This won't always be better than having ads in your sidebars or immediately above or below your posts - it all depends on what your blog is about, and how people read it.   But it may be worth doing to test to see which placement is better for your blog.


How to put Adsense Ads into Posts or Pages:

Blogger doesn't have any tools to support this.  So you need to put the AdSense code into your posts yourself.   While this is a bit fiddly, it does mean that you have a lot of control over where the ads go, and how they look, including the option to show image-only ads.

Follow these steps:
  1. Get the ad-code, and copy into your clipboard.  (The AdSense help page for this is here.)
  2. In the Blogger editor, write the contents of the post.
  3. In  Options (under Post Settings in the bar on the right of the Post Editor), check that "Use <br /> tags" is chosen for the Line Breaks setting.
  4. Go to the place where you want to put the ad.  Put in some "marker text" (a word that isn't used the post, eg "XXX" ).
  5. Align the marker text  the way you want the ad aligned (eg centered).
  6. Choose the "HTML" tab, and go to the marker-text.
  7. Replace the marker-text with the ad-text from step 1 (ie paste it in)
  8. If necessary, put line-breaks (<br />) before or after the ad.
  9. Publish the post, and check that it looks the way you meant it to.

Things to be aware of:

Google will only display a certain number of ad-units per page.   Even if you try to show more than this by putting the code into posts, ads will not be shown.

Also, having ads inside your posts does not mean that they will show up inside the RSS feed of your posts, or inside emailed posts created with the follow-by-email gadget or some other way:   If you use these tools, then you may want to enable AdSense for Feeds.


Related Articles:


Troubleshooting Adsense Ads in Blogger.

Putting 3rd party HTML into your Blog

Showing Image-only AdSense ads

Stop mis-use of your AdSense account

Chitika - an alternative advertising tool for bloggers

Uploading MS Word documents to Blogger - via Google Docs

/ Thursday, April 28, 2011 /
This article is about transferring material from Microsoft Word .doc documents to your Blog posts, using Google Docs to keep the formatting.


Previously in writing posts for Blogger in MS Word, I noted that if the source document is MS Word, then the only approach is to copy/paste via a text-editor.

Unless, of course you use a totally different tool like Windows Live Writer instead of Word.

But recently I had a Flash of the Blindingly Obvious (TM):   Google Docs lets you upload MS Word documents, and offers to convert them to Docs format during the upload.   Google Docs is web-friendly, and is pretty compatible with Blogger.   So it should be possible to upload a Word .doc to Docs, convert and open it in Docs and copy/paste into Blogger.


Does it work?


So far, I've tested this approach with two different documents:  a very simple document (one header and two paragraphs) and a slightly longer document with a lot of formatting (I took my own CV, took all the personal details out but kept the formatting).

You can see the results in these posts:
The results are promising.   In each case, the pasted contents were accepted by Blogger and the post published without any further editing.    

There are some issues:
  • In the complex document, the tablular layouts are followed strictly, resulting in some parts of the post that are wider than the standard column.
  • I haven't tested it with a long document (more than 4 pages):  in theory there shouldn't be any problems, but I have had issues with conversion of some larger document previously.
  • And I'm sure that it won't work with some of Word's advanced features that aren't (yet) supported by Docs,eg auto-generated tables.
  • I'm not sure how well conversion from Word on a Mac to Google Docs works.  
I'm keen to hear about other people's experience with this approach - please leave a comment below comment below.


Detailed Instructions:


Follow these steps to transfer material from Word to Blogger via Google Docs:
  1. Log in to Docs   (www.docs.googe.com)
  2. Click Upload ...
  3. Click Select files to upload ...
  4. Select the source files from your computer
  5. Made sure that "Convert documents, presentations, and spreadsheets to the corresponding Google Docs formats" is ticked 
  6. Click Start Upload ...
  7. When the upload is finished, choose Go Back to Google Docs
  8. Open the file in Docs
  9. Select the contents that you want to upload (possibly use Select All from the Docs menu)
  10. Copy (you may need to use Edit / Copy from the browser, not from inside Docs)
  11. Switch to the Blogger post editor, in Compose mode
  12. Paste.
  13. Add any other content that you want in your post.
  14. Preview the post, and do any final formatting changes that are needed.


Related Articles:


Writing posts for Blogger in MS Word.

Showing a PowerPoint Presentation as a slideshow in your blog

File sharing hosts:  places to store files used in your blog

File sharing hosts: places to store files

/ Wednesday, April 27, 2011 /
Sometimes, you may want to make a file available for download, or even just for reading, from your website or blog.  This article lists some options for this, and some of the issues involved.


System-file-manager Mac
  1. What is "file hosting"
  2. Google's file-hosting options (Docs, Sites, Picasa, Maps, Video)
  3. Some non-Google file-hosts (Your ISP, Scribd, Flickr et al, YouTube)
  4. Related Articles 

What is "file hosting"

Blogger lets you include the contents of video and picture files (.bmp, .jpg, .png files) in your posts.    But if you want to display any other type of file, or make a file available for your readers to download, then
  1. You need to store the file somewhere else, and
  2. The place that you store it in needs to make it available, on request, to people who ask for it (usually by clicking on a link in their web-browser), and
  3. You need to put an appropriate link to it into your blog.
A place that lets you upload a file, and then makes the file available is called a file-host.

Generally, when you upload a file to a file-host you need to set the security level, so that the host knows who is allowed to see (read) and change (edit) it.


Google's file-hosting options

Google Docs
Docs is Google's main file hosting tool.   You can now upload files of any type.   This includes text, xml, sql, and compressed (zip) files.

For some types (Word, Excel, PowerPoint etc) you have the option of leaving the file in it's "native" format, or converting it to Docs format.

After you have uploaded a file to Docs, you can set the Sharing options for it.   If sharing is set to either public or "anyone with the link", then you are given a link that you can use to share the file.

The link looks like:
http://www.blogger.com/post-edit.g?blogID=5681944372768269659&postID=2851854464091107939

and of course you can use it as the link for some anchor-text, like this in the same way that you create any other link.   (The words "like this" are linked to the same place as the long link that is shown above.)

When someone clicks on the link, they are taken to a Google Docs file viewer screen showing either:
  • A view of the document, with options to save, print or download it (if the file type is one that Docs supports), OR
  • A link to download the document (if it's not a file-type that Docs recognises)

If a document is in Google Docs format, you can edit it and the Share button (top right corner) has an option for Publishing it to the web.  Doing this creates a separate webpage, with its own URL, that anyone with the link can use to see the document.

Published documents give the option of a link, which looks like:
https://docs.google.com/document/pub?id=1p_QFNXNfXE56XwWuSgg3iU8rDt_a29lvTwqxN_wsSUU

or an embed code, like:
<iframe src="https://docs.google.com/document/pub?id=1p_QFNXNfXE56XwWuSgg3iU8rDt_a29lvTwqxN_wsSUU&embedded=true%22%3E%3C/iframe>

If you put the embed code into the HTML behind your post, you get something that looks like this:


(The document being displayed here is simply a word-processing file containing some text.)

Google Sites
Sites is another Google-based alternative for file-hosting.  

When you log in to it, you are prompted to either create a new (web)site, or to select an existing one.   If you do this, and create a new "filing cabinet" type of page, you have a place where you can upload files - of any type.

When you look at this filing-cabinet page, you see some action buttons (add a file, move it to a folder, delete it, subscribe to changes), and a list of files that have already been uploaded.   Each file that is listed shows the file name, and links to View (only for files of some types), and Download it.

A view link looks like:
https://docs.google.com/viewer?a=v&pid=sites&srcid=ZGVmYXVsdGRvbWFpbnxiaGF0ZmlsZXN0b3JlfGd4OjEzMjMxNDYyMDBjYWNiMzg

and a Download link looks like:
https://sites.google.com/site/bhatfilestore/template-management/Feedflare-sampleeBook.pdf?attredirects=0&d=1

You can copy the value beind these links from the Sites page in whatever way your browser supports (in IE8, it's right-click > Copy Shortcut)

A Sites file cabinet is a better file-storage option than Google Docs for some cases because:
  • You can easily get a download link which doesn't force readers see the file in a Google Viewer and require them to find and click a second link to put a copy of the file I'm offering onto their computer, and
  • The download link includes the name that the file has on your computer (or wherever else it was made):  this makes it a lot easier to double-check that you've attached the correct link to the right anchor-text.
  • If load a new file with the same name to Sites, then it simply replaces the existing file with the new one, notes that there is a new version - and the links don't change.
If you want to display the content of a file from Sites inside your blog, it may be possible to do so using a Google Web Element.   (This definitely works for PowerPoint files - still to check about others.)


Google Project Hosting
This is a tool for hosting code for open-source development projects. I haven't tried it yet (or checked the terms and conditions of use), but it may be a handy place for storing text files that can be read without having to go through Docs/Sites display screens.


Google Maps
Really, a map is just a (very specialised) type of file.  I've previously described how to put a Google custom map into your blog.

Picasa-web-albums
Picasa-web-albums (PWA) is a specialist file-hosting tool for pictures, and has many features that are not available in Docs, Sites, etc.   Since 2006, pictures that are put into Blogger posts are actually stored in an album in PWA.

I tend to upload pictures here first and then just link to their URL from Blogger, because this lets me control the resolution of the uploaded files.

Google Video
Video is where movies that are uploaded to your blog using the Video icon in the post-editor toolbar are stored. 

A major disadvantage is that it does not let you find or manage (delete, edit) videos that you have uploaded.   For this reason alone, I'd use YouTube, or Vimeo, or almost anything else if I wanted to put videos into a blog.  [NB  I haven't tried either .. yet.]

Non-Google file-hosting options

Your ISP
Some ISPs include file-hosting as part of their services.  You need to investigate how you can access and display files that they host for you - and whether you may be charged for traffic is a lot of people start downloading your files.

Scribd
This is one of a number of file-hosting services on the internet, and has been recommended by many Blogger users.

For PDF files, it provides codes that you can use to embed the pdf content in a Post, rather than forcing your readers to download it.

It's free, but has a restriction on how much an individual can download each day, so isn't good if you want only a few people to be getting large documents from your site).

DocStor
Another free-hosting site that has received good reports from many bloggers in the past.

Other Photo Sites:
Each site has slightly different features:  you may find that  flickr, Photobucket, Imagehosting, or FanBox suit your needs better than Picasa-web-albums, if you're want a "full featured" photo sharing system.

Or if you need very quickly accessible features, try something like:
  • Dropbox, 
  • CloudApp (for Mac) / FluffyApp (for Windows)
  • ImageShack - now called YFrog
  • Imgur
  • Min.us
(Thanks to LifeHacker for the list of recommendation).

YouTube
"The" site for hosting videos.   


Related Articles: 


Putting a Google custom map into your blog

Finding the URL for an image in Picasa-web-albums

Loading a Word document to your blog, via Google Docs

Showing a PowerPoint presentation in your blog, as a slideshow

Tools for applying copyright protection to your blog

Giving your subscribers a free file (eg an eBook) using Feedburner

Using Google Analytics to get statistics about AdSense performance on your blog

/ Tuesday, April 26, 2011 /
This article is about how to set up your blog so it collects data about your AdSense performance, using Google Analytics.

Google Analytics and AdSense


Recently, I described options for installing Google Analytics into blogs made with Blogger.

If you have decided to use Analytics, and you are also a Google AdSense publisher (ie person who has AdSense ads on your blog), then you probably want to take one more step, so that you can get statistics about AdSense on your blog from the Analytics tools.


Installing the extra code


After you have created a profile in Analytics, and installed the Analytic settings into your blog, go back to the Analytics Settings tab in Google Analytics.

If you have left the profile, find it and click Edit Profile (currently this is on the right of the screen).

The Profile screen that opens has sections for
  • Main Website Profile Information
  • Goals
  • Filters Applied to Profile
  • Users with Access to Profile
Currently the edit action for each section is in the right hand corner of the heading for the section.   

Click Edit in the title for the Main Website Profile Information section.

At the bottom of the screen, tick Yes, this profile should receive AdSense data

When you tick the button, a window with some code opens.   Copy the code.

Press the Save Changes button  (currently bottom left of the screen.

Install the code you into your blog either in the header or in a HTML/Javascript gadget.

What you and your readers will see


Installing this script has no effect on what your readers see.

But when you go into Analytics and look at any detailed report page, you will find that the AdSense Revenue tab will start to have data in it.   Currently the statistics that are reported are (even if there was no revenue) are:
  • AdSense Revenue
  • The number of AdSense ads that were clicked.
  • AdSense Page Impressions ie the count of of pages displaying AdSense ads that were viewed
  • AdSense CTR, ie the ratio of AdSense ads clicked to ad pages viewed.
  • AdSense eCPM, ie the estimated revenue from AdSense per thousand ad page views (assuming that future viewers and advertisers behave in a similar way to the previous one).

Data is only collected from the time that you installed the code into your blog:  Google does not collect it (at least not in a form that's accessible to you) until you ask them to.

Detailed advertising performance data is only available through Analytics for AdSense:  it's not available for the Google Affiliate Network and most certainly not for competing ad-services like Chitika.


Related Articles:


Installing Google Analytics for your blog

Advertising on your Blog:  some things to consider

AdSense and AdWords - understanding the difference

Putting Chitika ads into your blog

Understanding Google accounts

Adsense: how to stop malicious use of your AdSense account

Giving your subscribers a free file (eg an eBook) using Feedburner

/ /
This article shows how to make an eBook (or any file) available to your blog's subscribers with Feedburner's FeedFlare tool.   It's written for Blogger users, but most of the information applies to anyone using Feedburner.

Feedflare, a no-maintenance tool for giving away files on your blog


A give-away is one approach to get readers more more connected with your blog:  if you give people something of value, they'll feel warmer and fuzzier towards you, and read your blog more often (so the thinking goes).

No matter what you are giving away, you need a way of getting it to your readers.   This can be more time-consuming than you think, especially if it's an on-going gift for lots of people, not just a one-off gift for one lucky reader.

But if you give away a file, then you just need a computer to do the work for you:  you can put a link on your blog either in a post (like this) or as a gadget (eg linked to from a Picture, or as an entry in a Linked-list gadget).

However you might want to get a bit more cunning, and only make the gift available to people who actually subscribe to your blog, because people who have subscribed are more likely to come back again.  This doesn't guarantee an on-going connection - some folks will subscribe, get the goodies and immediately un-subscribe.   But probably some will become long-term readers.

Feedburner's FeedFlare tool makes it easy to distribute a file to subscribers, using your feed, by:
  • Putting the eBook (or whatever file) somewhere
  • Making a FeedFlare script to show the book, and putting somewhere that it can be read (it's just a text file)
  • Telling your Feed to use the script
  • Telling (potential) subscribers how to access the eBook from your feed. 

    1 Put the file somewhere:

    • Load the file that you want to distribute to any file-host.
    • If the file-host that you use provides security (99.9% of them do), make sure that the access options are set to either "everyone" or "anyone with the link".
    • Make a note of the URL of the file on this system.  
    • Sign out of your file-hosting account and test that you can access the file even though you're logged out.  
      (Testing it at this stage means that you don't have to worry about it later.)
    There are lots of places where you can host files (hosting simply means storing them, usually with some rules about who is allowed to read and edit them.

    I tend to use Google tools because there are less likely to be compatibility problems, so I've been using either Google Docs, or a file cabinet page on a Google Sites site.


    2 Make a FeedFlare script:

    •  Use Notepad (or any other text-editor) to make a text file containing the following:
    <FeedFlareUnit>
            <Catalog>
                <Title>THE TITLE TO SHOW *YOU* IN FEEDBURNER </Title>
                <Description>Download the eBook</Description>
            </Catalog>
            <FeedFlare>
                <Text>THE NAME THAT YOU WANT SUBSCRIBERS TO SEE</Text>
            <Link href="http://URL OF THE FILE YOU ARE GIVING AWAY"/>
            </FeedFlare>
        </FeedFlareUnit>
    • Customize the text (the bits shown in bold) to the correct values for your file. 
    • This file is your FeedFlare script.  Save it to your computer as YOUR-FILE-NAME.xml  
      Note that it needs to be .xml, not .txt.   
    • Upload the script file to a file host (see the section before for options) from where it can be read as a text file.  
    Note:  In the past, I've found that Google Docs doesn't work for this, because when something tries to read the file it's "served" with a Docs header.   I don't know if it's still the case, but I generally use a filing-cabinet page in Googe Sites to store text files, just in case.
    • Set the access options for this file to are set to either "everyone" or "anyone with the link".
    • Make a note of the URL of the script-file.  
    • Sign out of your file-hosting account and test that you can access the file even though you're logged out.  
      (Testing it at this stage means that you don't have to worry about it later.)

      3 Tell your Feed to use the script:

      • Log in to Feedburner account, with the account that owns your blog's feed.
      • Click on your Feed, to see the details about it.
      • Go to the Optimize tab.
      • Click on Feedflare (currently in menu on the left hand side, under Services)
        The Official FeedFlare section gives you a number of options for adding social networking tools to your feeds.
        In the Personal FeedFlare section, enter the URL of the XML file with your script (ie the one you uploaded in section 2)
      • Click Activate (if you haven't been using Feedflare before) or Save (if you have)


      What your subscribers will see


      Once you have done this, future posts that go out in your feed (both emailed feeds and via feed-reader software) will have an icon at the bottom, labelled with the value you put in for "THE NAME THAT YOU WANT SUBSCRIBERS TO SEE".

      When a subscriber clicks on this link, your eBook (or whatever the fileis ) will download to their computer, and may open depending on their settings for downloaded files.   In Google Reader, it looks like this - you may want to test it in a few feed-reader tools, depending on what your readers use.


      Troubleshooting:

      • If the URL of your feedflare file, or your eBook file, starts with HTTPS:// , then take the "S" out, so it becomes http://...
      • If you already had Feedflare activated and are just adding a script, you may get an error message when you click Save.   Try changing one of the Official Feedflare settings at the same time as you add the script name.
      Note that the link to the file is not included in items that have already been sent out in your blog's feed, only in new feed items that are generated after the script is added.


      Tell your readers and subscribers how to access the file:


      Making the eBook available through your feed is only the first step in getting value from it.  You also need to:

      By edited by Felipe Micaroni Lalli
      (http://commons.wikimedia.org/wiki/File:Cc_.png) 
      [CC-BY-SA-3.0], via Wikimedia Commons
      Tell your subscribers that it's there and how to access it:
      These peole are already using a feed-reader or email subscription, they probably won't have difficulty clicking the link - once they know it's there.  But it may be worth telling them what type of software they need to use to open the file.

      Tell potential subscribers about it:
      Casual readers, now and in the future, need to know that if they subscribe, they will get access to the eBook.   How much detail you need to provide (eg telling them how to subscribe, explaining what subscribing means etc), depends on your blog's niche and how "subscription-savvy" your typical reader is.

      You may find that some readers need a very detailed explanation.  It's likely that there are some good articles about this on the net already, but I don't currently have any links - if you find one, please do leave a comment below.


      Acknowledgement and further info:


      This article was inspired by:
      • A post in ProBlogger which described how to implement a file give-away in a WordPress blog (where it is possible to upload files to the root directory, meaning that the process is a little simpler), and
      • A person in the Blogger Help Forum who asked how to do something similar in Blogger, at about the same time I read the Problogger article.
      Many thanks to them both.

      You can do more complicated things than this using FeedFlare:  see the Feedflare Developer's guide for more inforation.  Also, their first "Hello world" script is a useful tool if you need to diagnose if problems getting this approach to work are due to file-hosting or to the feed itself.


      Related Articles:


      Adding social networking tools to your Feedburner feeds

      File hosting options.

      Encourage new subscribers by enabling Feedburner's FeedCount button

      Adding social networking buttons to your Feed

      Adding Amazon Associates product links and banners to your blog.

      Centering gadgets on your blog

      / /
      This article is about centering gadgets from 3rd parties that you install onto your blog.

      Previously, I've described how to put HTML code from a 3rd party into your blog.

      When code like this is put into a gadget, one common question is "how do I center it?"

      There are (at least) three options for doing this.


      Option 1:   Centre all the gadgets in your blog

      To do this, add a CSS rule to your blog.  The rule to add is:
      .widget {
        text-align: center;

      This will centre the contents and title of every gadget on your blog.


      Option 2:  Only center-align the specific gadget

      Put the code from the 3rd party (eg PayPal, Amazon, etc) inside a centering statement, like this:
      <div style="text-align: center;">

      PUT THE CODE FROM THE 3RD PARTY HERE

      </div>
      Install the code into your blog the way you would usually install this 3rd party code.

      This will centre-align the contents (not title) of the specific gadget that you add.

      Note the American spelling of the word "center" - and don't forget to put the closing </div> statement at the end.

      There may be some gadgets where it would be possible to add the centring statement to the gadget code itself, rather than putting it outside.    I don't recommend this (unless you're so comfortable with HTML and CSS that you don't need to be reading this article), because it introduces a risk that you will interfere with some other aspect, or that you will lose the centering if you ever need to refresh the code.


      Option 3 - Make a new style rule just for the gadget

      Define a new style that is to be used on specific gadgets:  put this new style into your template, and then apply it to the gadget like this.
      <div class="YourNewSytle">

      PUT THE CODE FROM THE 3RD PARTY HERE

      </div>

      This approach will only centre the gadget contents - not any header that you give to it.

      There are lots of options that you could put into the new style rule, but at a minimum it needs to have
      .YourNewStyle
      {
        text-align: center;
      }
      Notice that there is a "." (ie a full-stop) before the name of your new style.

      Also, it's best not to use a number as the style-name (eg "2nd-gadgetStyle"), because this doesn't work with some browsers.


      Related Articles: 


      Putting HTML code from a 3rd party into your blog

      Adding a new CSS style into your template

      Centering the header in your blog

      Putting a gadget above your blog's header

      Removing the attribution gadget from Designer-template blogs 

      How to put put Posts into your Pages in Blogger

      / /
      This article shows how to set up your blog, using Blogger, so that it looks like your posts are on separate web-pages.


      Can you put Posts onto Pages in Blogger?

      Ever since Google introduced "pages" into Blogger, people have complained that their posts all go onto the "home page", and asked how to put posts onto different pages in their blog.


      The standard, but unsatisfactory, answer is
      "Sorry, that's not how Blogger works.   So called "static" pages in Blogger are meant to be used for reference information that doesn't change often, which you don't want to be part of your regular post-feed, but which you do want users to have easy access to."

      Basically, this is part of the difference between post and pages.

      Luckily it's easy to set up your blog so that it looks like your posts are on different pages [tweet this],

      .... even though you and I know that this isn't how Blogger works.

      The only aspect that some people don't like is that their posts all show up on the "home page" was well as the topic pages, but even this can be worked around, at least sometimes.


      Follow these steps:

      1  Categorise your posts by adding Labels to them.


      2  Make a "pages look alike" menu bar:  

      There are (at least) are three ways of doing this - choose which ever one suits your blog best:
      a)   With a Labels Gadget:    
      Use the usual add-a-gadget approach to put a Labels gadget into the spot where you would put the Pages gadget if you wanted to make a horizontal menu bar with it.

      If your blog has some Labels that you don't want to have "pages" for, then set it to show only some of your Labels:

               b)   With a Linked-list gadget:   
      Use the usual add-a-gadget approach to put a Link-list gadget where you would put the Pages gadget if you wanted to make a horizontal menu bar with it.
      Add a link to the list for each Label that you want a "page" for.   The HTML to use for each Label value is

      http://YOUR-BLOGS-URL/search/label/THE-LABEL-NAME

      You can also add other items (eg individual Posts, or even Bllogger's static "pages" if you really must have them - see why I don't like them!) - see the menu bar at the top of this site for an example of this.


      c)   With a Pages gadget:   

      Use the usual add-a-gadget approach to put a Pages gadget into the menu bar area.
      Use Label-links described above the Linked-list gadget option, as website links to add to your Pages gadget.


      3   If you don't want all posts to appear on the "home page" was well as the topic pages, set your home page to show zero posts, by setting  "Number of posts on main page:" = 0   on:

      Post-Sept-2011-Blogger (aka the new interface)   Layout  > Blog Posts (edit),
      Pre-Sept-2011-Blogger (aka the new interface)     Design > Page Elements > Blog Posts (edit)


      Alternatively, you could use a technique similar to Showing a Gadget only on the Home Page  to not show the Blog Posts gadget on the home page.  the condition to use is !=  instead of ==)   If you do try this, then I strongly recommend that you consider the various options for giving your blog a home page, and make sure you accept the disadvantages of editing your template.


      Job Done

      It really is that simple.  Your readers can now click on the "pages" in your blog from a "menu" at the top, and see a list of posts for the Page that they chose.   Even better, if some posts relate to more than one topic, they show up on both of the relevant pages.

      Don't forget to test your blog, to make sure that the menu bar is working how you expect it to and that it looks OK, in all the browsers that your readers are actually using.


      I'm keen to hear if this approach works for you.
      • It is a "good enough" alternative to "real pages"?
      • Are there any other side-effects of using Labels to "pretend" to be web-page titles?
      Please leave your thoughts in the comments box below.


      Related Articles: 


      Using Labels to group your Blogger Posts

      Adding external and internal URLs to your pages-gadget / menu bar

      Giving your blog a home page

      The difference between posts and pages

      Showing a Gadget only on the Home Page

      Switching your blog from one custom domain to another

      / /
      This article is about how you can change a Blogger blog to use a different custom domain.

      Overiew

      Previously, I've described how to use a domain that you bought from  Google / Blogger for something other than a Blogspot blog.  But sometimes, you may want to keep using the blog, but switch it between custom domains - ie give it a different URL.

      Example:
      Fred  started out with fred-goes-fishing.blogspot.com, and initially purchased fred-fish.com.   But after using that for a while, he found that it wasn't quite right, so he changed to  FredsFishyTales.com.

      There are several ways to do this, but the simplest, and I believe most successful, is to:

      1)  Switch the blog back to use Blogspot (for a short time), and then
      2)  Repeat the custom domain purchase and switch process for the new domain, and
      3)  Tidy up the old custom domain.

      Switching the blog back to Blogspot:


      Log in to Blogger with the account that owns the domain.

      2  From the Dashboard,
      In pre-Sept-2011-Blogger (the old interface):  choose    Settings > Publishing > Switch to:  blogspot.com 
      In pre-Sept-2011-Blogger (the old interface):  choose    Settings > Basic, and in the Publishing area click on the cross to the right of the Edit link

      This changes your blog back to be www.YOUR-BLOG-NAME.blogspot.com, and removes the DNS records that pointed your blog to the old custom-URL.

      It may take a few hours (I've heard up to 72) for these changes to be applied to computers around the world, so people who go to the old custom domain may still get re-directed to your blog for a day or two. 

      Apparently it can take some time for Comments to be switched back, so before doing the next step you may want to wait for a short while, a couple of hours or maybe even a couple of days.


      Switching the blog to the new custom domain:

      1)  Make sure that the Google account which you want to own the new domain has administrator rights to the blog.

      (This isn't an issue if you only have one Google account, but may be worth thinking about if you plan to transfer the blog to someone else in future.)
       
      2)  Log in to Blogger with that account

      3)  From the Settings > Publishing tab, choose Switch to Custom Domain

      4)  Use the standard blogger method of buying the new domain.

      I very strongly recommend setting up an administrator account for the new domain so that you can manage this domain in the future

      If you are asked if you want to enable Sites, answer NO.

      If all goes well, your blog should now be pointing to the new web-site address that you have purchased.   If there's a problem, post a question in the Blogger Help Forum.  Include the URL of your blog and the domain name (aka URL, website-address) that you're trying to switch to.

      Once the new custom domain is working, you way also want to change the source for any RSS feeds that were coming from the old domain.


      Cleaning up the old custom domain:

      Even if you don't want it any more, you still own the old custom domain for as long as you had purchased it for.   If you got it from Google, this will be until a year after your last purchase. The only exception is if you purchased from a registrar who allows refunds (most don't.)

      You may want to sure that you're not going to automatically renew the old domain (make sure the box is un-ticked instead of ticked).  

      In the meantime, though, your options for the old custom domain include:

      • Do nothing
      Anyone who goes to it will just get a 404 / site not found error.

      • Use a blog to tell people about the redirect:
      Create a new blog that just has one post explaining where your old blog has gone.

      Set up this new blog to use the old custom domain from Settings > Publishing > Switch to Custom Domain > Switch to Advanced Settings.

      I'm 99% certain that you don't need to worry about the set-up instructions, because they will have been done the first time around.

      • Use a domain re-direct
      This means that anyone who goes to your old domain (either directly or by selecting it from Google search results) is automatically taken to your new domain.

      There is a way to do it from Blogger - but it's a hack that tends to get your blog detected as spam.

      The better way is to set up a re-direct with the domain registrar (ie whichever of GoDaddy and eNom the old domain was purchased through).  The directions for doing it are different for every domain registrar, so you need to read their help instuctions.  You do need to get into the domain control panel to get the access details.  If you don't have the details (ie domain administrator ID and password) for doing that, try using this help-process choosing:
      - I never created an administrator account, then
      - I signed up at Google.com/a and purchased a domain name at the same time

      If you need help, check the support forums (etc) provided by the relevant domain registrar.

      • Use the old domain for something else
      Previously this could include AdSense for parked domains (if you're already an AdSense publisher) - but that option has now been turned off>   So you may want to investigate other , or something totally different - see the second part of using a custom domain for something other than a Blogspot blog for help with this.

      You may even want to sell the old domain to someone else, in which case you'll need to learn about the domain transfer process.


      Related Articles: 


      Using a custom domain for something other than a Blogspot blog

      AdSense for parked domains

      Setting up the domain administrator for your domain

      Automatically renewing your custom domain

      Understanding Google accounts

      Transferring ownership of your blog to another Google account

      Blogger and other Google products - an overview

      The Attribution gadget has a "Remove" button - for today anyway.

      / /
      For now, you can manage the attribution gadget on your Blogger blog in much the same way as any other gadget.  Congratulations to Blogger for listening to what we wanted, and making this change.

      What's this about

      When Google introduced Designer Templates, they included a new Attribution gadget, which puts a line about "Powered by Blogger" at the bottom of each blog.  Bloggers could add extra information to this line, but couldn't change the core message.

      Unlike most other gadgets, the Attribution gadget didn't have a Remove button.   So Blogger-users put a lot of effort into finding ways to remove the attribution, and Google put a lot of effort into detecting that it was removed and putting it back again - sometimes in the "right" place in the footer, sometimes at the bottom of the sidebar.  

      Today, someone pointed out that the gadget now has a remove button, so you can remove it the "normal" way.


      Does it work?

      And when I tested it a few minutes, it the attribution gadget appeared to stay removed:  I couldn't see it back in the sidebar or anywhere in my blog's footer.

      That doesn't guarantees that the button will stay there:  it could easily be a mistake that's been made.   And if it is, I'd expect that the Remove button will disappear again one day soon.

      So if you want to use the Remove button instead of taking the risks involved in editing your template in order to get rid of the attribution, then I'd recommend acting quickly.


      Getting the attribution back

      The attribution gadget isn't in the list shown under Design > Page Elements > Add a Gadget at the moment.

      So if you remove it, then you cannot add it back.

      If you really want it back, you will either need to pick a new template or build your own attribution using a HTML or text-gadget


      Related Articles: 


      Removing your blog's attribution gadget

      Making a credits / attribution link for your blog

      Editing your template:  advantages and disadvantages.

      Types of Blogger Template

      Restricting your Blog's readers isn't as secure as you thought

      / Monday, April 25, 2011 /
      This article explains some of the issues with restricting readership of your blogspot blog to just people who you choose, and why you can appear to have unexpected readers.

      When you first set up a blog, anyone in the world can read it (if they can find it - how to get them to there is a different story!).

      But some people want to keep their blog private, just for them and their friends (or teachers, students, other parent, classmates, etc).   This is fine, provided they don't mind that only up to 100 people - ever- can be invited to read the blog, and that it doesn't have an RSS feed so cannot offer email subscriptions.

      Stopping everyone from reading your blog:

      In the Settings / Permissions tab (old interface) or Settings > Basic:  Permissions tab (new interface), there is an area where Blogger lets you restrict the readers of your blog to anyone, selected people, or authors only.


      (this picture is from the old interface - then new one is very similar)


      Restricting access to readers only

      If you tick "only people I choose", the screen lets you enter email addresses of people who you want to invite to read the blog.

      When you email someone an invitation, they get a message like this:
      "To view this blog, visit:


      http://www.blogger.com/i.g?inviteID=someNumbersThatIdentifyYourBlogInvitation


      You'll need to sign in with a Google Account to confirm the invitation. If you don't have a Google Account yet, we'll show you how to get one in minutes, or you can view the blog as a guest for up to 30 days."

      When someone clicks the link in this email, they are asked which Google account they want to use to sign in to your blog, or given the opportunity to sign-up for a Google account if they don't have one already.

      This is good, because it lets you invite people who don't, yet, have google accounts to view your blog. But it does mean that your blog may appear to have readers who you didn't invite.


      Signing in with a different address

      There is noting that forces the email address associated with that Google account that accepts your invitation to be the same as the one that you sent the invitation to.

      Once someone has accepted an invitation, the list of readers just shows you the emails of the readers you have:  it doesn't show you the link between them and the person who you sent the invitation to.

      For example, if you emailed an invitation to mary@gmail,com, but the Mary also has a Google account with manager@google.com as it's email, she could choose to reader your blog with the manager account - and you would see manager@google.com in your list of readers.


      Exception:  Forwarded Invitations

      People who you invite can forward the invitation-email to other people, and they too can sign into your blog.  (Each invitation can be used multiple times).

      If this happens, the readers are put into a group, and the Permissions tab shows you the email address that you send the invitation to, and the emails of the people who've accepted the invitation.   And it lets you remove the permssions either from individuals, or from the whole group at once.


      Guest sign-on:

      If the person you invited wants to, they can choose to sign in as a guest for up 30 days. However Google bases this on the IP address they are using at the time.   This causes a couple of issues:
      • If they're on a shared computer, then anyone else who uses that computer can read your blog (if they can find it - for example, by looking in the browser history file).
      • If their internet service (ISP) uses dynamic IP addresses (ie you get a new one every time you connect) then the person who accepts the invitation will only be able to read the blog during their current internet connection.   And anyone else who gets the same IP address in the next 30 days will be able to read the blog (though it's unlikely that they will be able to find it).


        An Example


        (note to spammers:  using the wonders of MS Paint, I have changed every single email address to something invented - so don't bother!)

        In this example:

        An invitation was sent to Hazel@gmail.com, but she chose to sign in as UglyDuck with an email of motherUgly@gmail.com

        An invitation was sent to KevinLotus,
        • KevinLotus accepted it but signed in as Enquiries, 
        • He also forwareded it to IrishTransport who signed in as herself.
        An invitation was sent to mary@nxtrix.gen, but she chose to view the blog as a guest for 30 days, so it looks like her invitation is outstanding.


        Email isn't secure!

        Having said all the above - remember that email isn't really secure anyway.   Security experts usually say that email is just like a a post-card:  your messages can be read, in plain text, by every postal-worker whose hands they pass through.   Or in computer terms, by every server that that the pass through on the journey between you and the recipient.

        So, if someone really, really wants to read you blog, they may figure out how to "sniff" your email.   This isn't easy (and someone who can do it may be able to find easier ways to hack into your blog anyway), but is possible.

        If what's in your blog really is super-sensitive, you need to choose whether it's worth taking the risk of using tools like this (and I think it is, in many cases, because the risk is small-ish), or whether you need to look for a set of tools that is more secure.


        Related Articles: 


        Understanding Google accounts

        Transferring your blog to a new owner


        Posting by email - knowing who said what


        Copying a post from one blog to another

        / /
        This article is about how to copy a post from one blog to another, using Blogger, while keeping all the formatting, pictures and layouts.

        There is a separate article about copying all, or most, posts from one blog to another.


        One way to move a post from one blog to another is by copying and pasting it into the post-editor in a new Post in the second blog.

        However sometimes this doesn't work:  formatting, picture positions or hyperlinks are lost.

        But behind every Blogger post is just HTLM:  So, you can can copy content from one Post to another by copying the HTML, and pasting it to the destination blog as HTML.

        This works even if the blogs belong to different Google accounts (although sometimes you may need to save the HTML in a text-editor (eg NotePad) while you log out and in again, or perhaps even email it (as a plain-text) message to someone else who has author rights in the second blog.


        Follow these steps to move a post to another blog:

        1  Log in to Blogger, and Edit the post you want to move.

        2  Click on HTML (or Edit HTML in the old Blogger), to see the code behind the post.


        Copy all the code 
        (put the cursor in the code, ad  press Ctrl / A to select it, then press Ctrl C to copy)

        Open the blog that you want to move the post to
        (You may need to log out and in again, or perhaps just switch to different browser or tab)

        5  Create a New Post


        6  Click on HTML or Edit HTML, so you can see the space where the code goes

        Paste all the code

        8  If necessary, click on Post Options and make any changes you need there (eg viewing or not viewing comments or back-links)

        9  Click Publish, and check that it looks ok


        This an easy way to move an individual post (or part of a post) - there are other easier ways to move all posts between blogs, and move some posts between blogs.


        Related Articles: 


        Moving all the posts from one blog to another

        Converting Posts into Pages

        Understanding Google accounts

        Options in Blogger's post editor

        Removing the Attribution gadget from blogs that have Designer Templates

        / /
        This article is about how to change or delete the attribution that Google has added to add blogs which have a Designer template.    (Updated May 2011 with the latest status of the methods listed.)

        What is the attribution - and what's wrong with it.

        picture of Powered by Blogger being painted over, with a purple picture frame border
        If your blog has a Designer template (ref What sort of template do I have?) you may have noticed a gadget in the blog-footer called attribution.   This gives credit to:
        • The template designer
          (Even though s/he only designed the structure, not the colour, font and gadget layout combination that you're using - and readers who aren't familiar with Blogger probably won't understand the distinction between your work and the template-programmer)
        • The copyright owner of the background photo you're using
          (Even though s/he doesn't own any of the zillion other photos in your blog - and again, readers aren't going to understand what photographs are part of the template and what aren't)
        • Blogger for "powering" your blog
          (Even though they're hosting it, and the real power may be provided by other tools:  eg I have blogsites hosted by Blogger but whose real power comes from Google Maps, Google Custom Search, and Sites.)

        The gadget also has a field "Copyright (optional)".  Whatever you put into this is shown at the beginning of the attribution.  It will accept some simple HTML commands, for example a line break (<br />) as shown in the picture.   But I have a feeling that adding something more complex, eg an entire Creative Commons statement, won't work.


        How to remove the Attribution Gadget

        Removing this gadget has been troublesome since it was introduced.   Several times, we found a method to remove it, which worked for a while.   But then Blogger added a check for that method, and code to put the gadget back again each time the template was saved - so we had to find another approach..

        For a while they stopped putting the gadget back and the earlier, simpler methods of removing the gadget were working.  Then they stopped again.   So the complete list of removal methods that I've found, with notes about their current status, is below.

        WARNING:  

        I have not checked the Blogger Terms and Conditions to find out whether you are allowed to remove the Attribution.   Even if they don't mention it today, a requirement to keep the statement could be added tomorrow.   This advice does not mean that I, or Google/Blogger, are saying that you should/can/may/must remove the attribution statement.


        Methods that currently work:


        Techniques that used to work, but don't any more:
        • Unlocking and removing the gadget
          This worked initially, then stopped.   Most recently (Jan 2011), it was working again.    If you try it, and it doesn't work, please leave a comment below, and try one of the other methods.


        Advantages and Disadvantages:

        I'm not keen on methods that involve hiding things, because it may make search-engines think you're being sneaky.

        But changing the template-name may mean you don't get improvements that Google apply to the standard templates in future (eg support for new browser features, bug-fixes).

        It may also mean that you get less-sympathetic responses to future question in the Blogger Help Forum:  when people use 3rd party templates, one regular reply to, "how do I do XXXX to my template"  is "ask your template provider."

        To avoid this, you should at very least remember what template you were using, and possible even rename yours to something like "WHATEVER, based on Awesome".


        Give credit where it's due: 

        If you do remove the standard attribution gadget, it may be a good idea to replace it with a customised attribution that acknowledges any or all of your domain registrar, blog-host (Blogger, AKA Google), file host, template designer and customiser, graphic designer, content writer(s) - in short anyone whose efforts have contributed to your blog.


        Related Articles: 


        Giving your blog a customised attribution gadget

        Adding a CSS rule to hide the attribution gadget

        Changing your template name or designer-name

        Removing attribution from mobile-template blogs

        Deleting the attribution gadget by unlocking and removing it

        Deleting the attribution gadget by commenting out the code.  

        How the data in your Blogger blog is organised

        Labels

        Thank you for visiting my site. I’m the author of home decor help, home garden decor, home design interiors, tina 4 home design, uhozz, visit yogurt lab, sitazine, is beauty tips and sunnijati website. Modestop Topmodest Free Beauty Tips Shitazine Sitahouseblog Izhealthy Shitadesign Sitahouse Topmodest Sitazine Irezine Home- decor-design Shitadesign Shitadesign-dot-com Inhomeland inhouseland ghiuldenika inebautystyle enterarteiuna radiodominiopublico biberealexandru fabiobernadosdi geeklore31 syahadah-alhafeezah peaceloveiman bigwideempty techandchefadventures kaosgunlugu fikirkulubleri duazinciri theinternationalrules morefortngintn monkeymanzach lifeatthegreenys photokid84 chelsea-settles chasingmommyhood sexyhotactresseswallpaper tophotnewstodays avvani urbantrendsussex voychic reisyamode sitazine reportmy homedesignideasx mystylepinterest fashionstyleco popularnewstips isexy-hot-girls sexywomengirl trendymodeku derumahdesign womenhairs hackoblogger gadiswomen homeinteriordesignideas1s homedesignideasa uniquehomedesignsw enterpreneurforbloggers earningblogtipss lilyandgiasmom onfeatureblog aboutadsen onblogsocial tecnologiku onlinekutip akuhub caramakemoney youseoneed blogukus newbieblogit adsenseguideto triond-adsense inseoservice intipseoblog otherseoblog freeseoguid seoblognets tawaguideblog seosecretip buzdesign modewomen gayawoman cantikide tipsehat bebeautyps tipsjilbabcantiks idekontenislami healthfitnessnutritionsz jilbab-tips tips-home-decor caramemakaijilbabv beritaremajaterkinie allisoncrewnews mypinspinterest mypinspinterest gogirlsgallery seyhotgirls topmodest worldotgirls seksigirlsblog yourgirlsnet sexywomensia decorativehousedesigns simplebloggertipsz aboutadsense09s marketingner freeseotipstricksz womensiana chicstylegallery oblogkudewe colhomegallery marketserve onlibusiness artodesign designinguide oninteriorhome interiormu intutorblog blogoffeed newbloggerhint enginseo dibisnistips internetmublog onroomdesign homegardenco

        Blog Archive

         
        Copyright © 2010 New Blogger Tips, All rights reserved
        Design by DZignine. Powered by Blogger