Blogger have announced that the documentation for people who write tools using the Blogger APIs has moved to https://developers.google.com/blogger/
This iinformation is what you need to know to create and share you own gadgets. It is also very useful for blogger-helpers who want to understand the data / schemas that Blogger uses, in order to work out hacks for the rest of us to use to control the look and feel of our blogs.
The blogger developer forum is another very handy place too.
Blogger developer documentation has moved
/
Monday, March 26, 2012 /
Posted in
API,
Documentation,
from Blogger-HAT Lite,
Gadgets,
Quick-tips
Styles on Blogger's post-editor menu bar
/
Saturday, March 24, 2012 /
Posted in
Article,
Post Editor,
SEO,
Styles
This article shows how the styles that can be applied in Blogger's style-bar look.
What do these styles do.
This week, without any announcements that I've seen, Blogger added a style drop-down to the menu bar.
I noticed it first on Thursday night (UCT) and have since confirmed that it's in both the new and old interfaces.
This small-but-important change makes it a lot easier to add SEO friendly "tags" to your blogger content.
If you use the "header" style on some text, the HTML behind the post says
However using these tags, by inserting them myself, is something I tried to do in the past, but gave up on because of issues with how my posts looked in RSS-feed-readers and also for email-subscribers.
So I'm very interested to see how they work, and how they look for my readers. And this post is a way to find out.
What do they look like?
The heading above this paragraph is done in my usual way, applying the largest size and bold to the text. And this is some more text to make the paragraph look fuller, so I can get a better idea of what the headings look like.
The menu-bar in the post editor now looks like this:

Notice that it has the same formatting as my gadget headers and post-date. I don't like this at all - am waiting to see if it's something that Blogger changes (or maybe has already changed, but can't apply to my blog because I've edited the template a lot), or whether I need to work out how to assign different styles to them myself.
And this is some more text to make the paragraph look fuller, so I can get a better idea of what the headings look like.And this is some more text to make the paragraph look fuller, so I can get a better idea of what the headings look like. And this is some more text to make the paragraph look fuller, so I can get a better idea of what the headings look like.
And this is some more text to make the paragraph look fuller, so I can get a better idea of what the headings look like.
And this is some more text to make the paragraph look fuller, so I can get a better idea of what the headings look like. And this is some more text to make the paragraph look fuller, so I can get a better idea of what the headings look like.
The heading below this paragraph is done with the "minor style". In the post-editor, it makes the heading look like it's bold, again with some extra padding above and below it.
What your readers see:
 That's what I'm trying to find out!
I thought about doing all this in a a test blog - where I would have needed to set up an RSS feed and an email subscription etc. But that was a lot of work, and I figured that some of my readers might be interested in the results too.
I'll be looking at this post in my own email and in Google Reader. But if you have any feedback on how they look in other feedreaders, I'm very keen to hear how they worked. Ditto if you are reading this through any kind of assistive-technology software or screen reader.
Why have Google done this?
Since the new privacy policy was introduced, there's been a small-but-noticeable move towards other search engines. In my blog-statistics, visitor traffic is coming from a wider range of places. There's no one winner getting a lot of alternative traffic - and I certainly haven't seen more visitor from Bing or Yahoo! But I suspect that Google have decided that a little bit of work to make our blogs more Google-SEO friendly would be a good idea.
What's why they announced the various options for "customising your search preferences" (which are nothing to do with your search preferences, and everything to do with how your blog looks in Google search results when other people search.
And I think it's why they've slipped in the style bar, while all the blogger helpers are busy trying to understand the implications of the search-preference change.
Related Articles:
Setting up Google Analytics for your blog
What is an RSS feed reader
Adding am email-subsription option to your blog.
What do these styles do.
 |
| By Vishraval (Own work) [Public domain], via Wikimedia Commons |
I noticed it first on Thursday night (UCT) and have since confirmed that it's in both the new and old interfaces.
This small-but-important change makes it a lot easier to add SEO friendly "tags" to your blogger content.
If you use the "header" style on some text, the HTML behind the post says
<h2>Some text</h2>and "all" the SEO-gurus say that using H2's properly is important to rank well in search results.
However using these tags, by inserting them myself, is something I tried to do in the past, but gave up on because of issues with how my posts looked in RSS-feed-readers and also for email-subscribers.
So I'm very interested to see how they work, and how they look for my readers. And this post is a way to find out.
What do they look like?
The heading above this paragraph is done in my usual way, applying the largest size and bold to the text. And this is some more text to make the paragraph look fuller, so I can get a better idea of what the headings look like.
The menu-bar in the post editor now looks like this:
This is a heading
The heading above this paragraph is done with the "heading style". In the post-editor, it makes the heading look like it's in "larger", ie not largest, with some extra padding above and below it.Notice that it has the same formatting as my gadget headers and post-date. I don't like this at all - am waiting to see if it's something that Blogger changes (or maybe has already changed, but can't apply to my blog because I've edited the template a lot), or whether I need to work out how to assign different styles to them myself.
And this is some more text to make the paragraph look fuller, so I can get a better idea of what the headings look like.And this is some more text to make the paragraph look fuller, so I can get a better idea of what the headings look like. And this is some more text to make the paragraph look fuller, so I can get a better idea of what the headings look like.
This is a sub-heading
The heading above this paragraph is done with the "sub-heading style". In the post-editor, it makes the heading look like it's in "larger", ie not largest, with some extra padding above and below it.And this is some more text to make the paragraph look fuller, so I can get a better idea of what the headings look like.
And this is some more text to make the paragraph look fuller, so I can get a better idea of what the headings look like. And this is some more text to make the paragraph look fuller, so I can get a better idea of what the headings look like.
The heading below this paragraph is done with the "minor style". In the post-editor, it makes the heading look like it's bold, again with some extra padding above and below it.
This is a minor heading
- And this is some more text to make the paragraph look fuller, so I can get a better idea of what the headings look like.
- And this is some more text to make the paragraph look fuller, so I can get a better idea of what the headings look like.
- And this is some more text to make the paragraph look fuller, so I can get a better idea of what the headings look like.
What your readers see:
I thought about doing all this in a a test blog - where I would have needed to set up an RSS feed and an email subscription etc. But that was a lot of work, and I figured that some of my readers might be interested in the results too.
I'll be looking at this post in my own email and in Google Reader. But if you have any feedback on how they look in other feedreaders, I'm very keen to hear how they worked. Ditto if you are reading this through any kind of assistive-technology software or screen reader.
Why have Google done this?
Since the new privacy policy was introduced, there's been a small-but-noticeable move towards other search engines. In my blog-statistics, visitor traffic is coming from a wider range of places. There's no one winner getting a lot of alternative traffic - and I certainly haven't seen more visitor from Bing or Yahoo! But I suspect that Google have decided that a little bit of work to make our blogs more Google-SEO friendly would be a good idea.
What's why they announced the various options for "customising your search preferences" (which are nothing to do with your search preferences, and everything to do with how your blog looks in Google search results when other people search.
And I think it's why they've slipped in the style bar, while all the blogger helpers are busy trying to understand the implications of the search-preference change.
Related Articles:
Setting up Google Analytics for your blog
What is an RSS feed reader
Adding am email-subsription option to your blog.
Removing the navBar from your blog
/
Friday, March 23, 2012 /
Posted in
Article,
Blog layout
This article explains what Blogger's navBar is, what features it offers, and how to turn it off if your blog-site doesn't benefit from these features
 At the top of most blogger blogs, there is a strip with some handy functions on it.
This stripe is called the navBar (short for navigation bar), and it can be incredibly handy for your readers - if those readers are Blogger users, or at least Google users, and so appreciate it. For others, however, it's just clutter, and a waste of perhaps 15px of above-the-fold space.
On the left hand side, the navigation bar (aka the blogger bar) has tools for visitors to your blog:
On the right hand side, if you are logged in and looking at a blog which you have administrative rights to you can see:
Or if a visitor is logged in, but doesn't have administrative rights for the blog they are looking at (ie if they are a visitor looking at your blog), they can see
These functions have their uses, although I wouldn't rely on people to see them: if you want your blog to be popular, you'd be far better off adding your own custom search engine and social networking icons).
But if you want your blog to look like a website, the navBar should be on your hit-list of things to be removed.
(And if you're wondering why your blog doesn't have these handy functions at the top, it's either because your templates already has them removed, or because you are using a blog with a dynamic template: these don't have a nav bar at all.)
UPDATE:
The following is now redundant, because Blogger have added an Off option to the navBar options. It's being kept here for reference only.
Also the Off option leaves an empty space at the top of the blog - you can remove it using this simple tip.
To get rid of the navBar, just follow the usual way of adding a CSS rule to your template, and add this rule:
And if you want to close up the space at the top where the nav-bar used to be, add this CSS rule too:
Some people may remove the navBar because they want to use Blogger for purposes that are against the terms and conditions, and don't want to be reported.
Sadly for them, the lack of a "Report Abuse" link doesn't help very much: if you see a blog that you want to report, you can simply used Blogger's terms of service complaint submission system, and type in the link to the blog or blog-post yourself.
What is the navBar in a Blogger blog?

This stripe is called the navBar (short for navigation bar), and it can be incredibly handy for your readers - if those readers are Blogger users, or at least Google users, and so appreciate it. For others, however, it's just clutter, and a waste of perhaps 15px of above-the-fold space.
On the left hand side, the navigation bar (aka the blogger bar) has tools for visitors to your blog:
- A quick link to the Blogger software, ie www.Blogger.com (the capital B icon on the left)
- Search - access to a very cut down search function
- Follow - a quick way to follow your blog
- Share - a very simple set of social-networking share buttons
- Report Abuse - linking to Google reporting centre
- Next Blog - a link that takes the reader to a semi-randomly chosen blog made with Blogger (semi-random because it's matched on topic, to some extent)
On the right hand side, if you are logged in and looking at a blog which you have administrative rights to you can see:
- Your Google account name
- A new post link
- A link to the Blogger Design tab for the blog you are currently viewing
- A sign out link, to let you log off your Google account.
Or if a visitor is logged in, but doesn't have administrative rights for the blog they are looking at (ie if they are a visitor looking at your blog), they can see
- Their own Google account name
- A link to their own Blogger dashboard
- A sign out link, to let them log out of their Google account.
These functions have their uses, although I wouldn't rely on people to see them: if you want your blog to be popular, you'd be far better off adding your own custom search engine and social networking icons).
But if you want your blog to look like a website, the navBar should be on your hit-list of things to be removed.
(And if you're wondering why your blog doesn't have these handy functions at the top, it's either because your templates already has them removed, or because you are using a blog with a dynamic template: these don't have a nav bar at all.)
How to take the navBar off your site:
UPDATE:
The following is now redundant, because Blogger have added an Off option to the navBar options. It's being kept here for reference only.
Also the Off option leaves an empty space at the top of the blog - you can remove it using this simple tip.
To get rid of the navBar, just follow the usual way of adding a CSS rule to your template, and add this rule:
#navbar-iframe { height: 0px; visibility: hidden; display: none;}
And if you want to close up the space at the top where the nav-bar used to be, add this CSS rule too:
#navbar { height: 0px; visibility: hidden; display: none;}
How to report abuse on a blog that has the navBar removed:
Some people may remove the navBar because they want to use Blogger for purposes that are against the terms and conditions, and don't want to be reported.
Sadly for them, the lack of a "Report Abuse" link doesn't help very much: if you see a blog that you want to report, you can simply used Blogger's terms of service complaint submission system, and type in the link to the blog or blog-post yourself.
Do make sure that you review the list of things that Blogger will accept complaints about: it's not a good idea to get a reputation as someone who cries wolf, just in case you need to report something genuine later.
Adding a CSS rule to your blog
Linking your blog and the social-networks
Understanding Google vs Blogger accounts
Adding a custom-search-engine to your blog
Related Articles:
Adding a CSS rule to your blog
Linking your blog and the social-networks
Understanding Google vs Blogger accounts
Adding a custom-search-engine to your blog
Stop Pinterest from sharing your pictures or blog-posts
This article shows you how to stop people from "Pinning" your blog-contents on their own Pinterest accounts.
 Recently I've been investigating Pinterest, and why some blog-publishers, especially those of you who use pictures that you aren't authorised to distribute any further, may want to ...
Stop people sharing your posts & images on PInterest [tweet this]
I'll share more about this soon. But in the meantime:
How to prevent people Pinning from your posts:
PInterest have provided a way for website owners to make it impossible for people to Pin pictures or articles from their site, by adding a very simple piece of code.
Unfortunately Blogger's post-editor doesn't allow meta-tags, so it cannot be applied to individual posts as you edit the post. Instead, you have to add the code to your template file. To do this:
1) Edit your template - you don't need to expand the widgets.
2) Find this text:
3) Add this line of code after the <head> tag:
If you just want to block a specific post from being shared on Pinterest,
If you want to keep your template tidy, then you may want to find any other meta-tags already in the header section, and place this one with them. If tidiness matters to you like this, then I'm assuming you now enough to find the right spot, and to not nest the tags inside each other.
4) Preview (to make sure you've done it right)
5) Save the template change.
What your readers see
If you have installed the PInterest-blocking code, and one of your visitors tries to pin a blog-post of yours anyway, they get this message:

Depending on your niche, you may want to have a note somewhere on your blog, explaining why you don't allow pinning of your posts, and why.
How well does it work
Based on some quick tests, it's working well:
That said, it cannot do magic. Any moderately computer-savvy reader can get the direct URL for a photo in your blog, and pin that without going through the blog. You could stop this by disabling right-clicks, but even so clever readers will just take screen-shots and make their own copy of your photo (and it has other side-effects too). So for images that you particularly want to protect, the usual blogger copyright protection techniques are still very relevant.
Stopping sharing to other social networks:
I don't currently know of any way to stop readers sharing your blog to any other social networks (Facebook Twitter, LinkedIn, YouTube, etc).
However, the other networks are more about sharing your status, and less about sharing other people's creations. If you have privacy concerns that make you want to stop people there from sharing "your" content, then the best approach is probably to just not post the material to the internet at all.
But if you do know ways to stop sharing, I'd love to hear about them.
Related Articles:
How to edit your Blogger template
Copyright, blogs and bloggers - tools for applying copyright protection to your blog
Linking your blog and the social networks
Putting "share this on Facebook" etc buttons into your blog

Stop people sharing your posts & images on PInterest [tweet this]
I'll share more about this soon. But in the meantime:
How to prevent people Pinning from your posts:
PInterest have provided a way for website owners to make it impossible for people to Pin pictures or articles from their site, by adding a very simple piece of code.
Unfortunately Blogger's post-editor doesn't allow meta-tags, so it cannot be applied to individual posts as you edit the post. Instead, you have to add the code to your template file. To do this:
1) Edit your template - you don't need to expand the widgets.
2) Find this text:
<head>(You may need to look for <head SOME-OTHER-STUFF>, depending on what template you are using. I just search for "<head", ie without the closing bracket, and make sure that I do what is needed after the closing bracket).
3) Add this line of code after the <head> tag:
<meta name="pinterest" content="nopin" />Or
If you just want to block a specific post from being shared on Pinterest,
- add this code
<b:if cond='data:blog.url == "PUT-THE-POST-URL-HERE"'>
<meta name="pinterest" content="nopin" />
</b:if>
- and replace PUT-THE-POST-URL-HERE with the full address of the post that you don't want anyone to pin from
(eg http://blogger-hints-and-tips.blogspot.com/2012/03/putting-tweet-this-quote-link-in-blog.html)
If you want to keep your template tidy, then you may want to find any other meta-tags already in the header section, and place this one with them. If tidiness matters to you like this, then I'm assuming you now enough to find the right spot, and to not nest the tags inside each other.
4) Preview (to make sure you've done it right)
5) Save the template change.
What your readers see
If you have installed the PInterest-blocking code, and one of your visitors tries to pin a blog-post of yours anyway, they get this message:

Which reads
"We could't find any images: This site doesn't allow pinning."
even though Pinterest's own documentation promised that it will read:
"This site doesn't allow pinning to Pinterest. Please contact the owner with any questions. Thanks for visiting!"
Depending on your niche, you may want to have a note somewhere on your blog, explaining why you don't allow pinning of your posts, and why.
How well does it work
Based on some quick tests, it's working well:
- It appears to apply despite the country-specific-URLS - I couldn't pin anything from http://blogger-hints-and-tips.blogspot.co.nz
- It deals with posts as well as the overall URL: it gave me the same error message when I tried to pin http://blogger-hints-and-tips.blogspot.com and http://blogger-hints-and-tips.blogspot.com/2010/03/putting-facebook-share-this-badge-on.html
- The specific-post-only code worked when I tested it, too.
That said, it cannot do magic. Any moderately computer-savvy reader can get the direct URL for a photo in your blog, and pin that without going through the blog. You could stop this by disabling right-clicks, but even so clever readers will just take screen-shots and make their own copy of your photo (and it has other side-effects too). So for images that you particularly want to protect, the usual blogger copyright protection techniques are still very relevant.
Stopping sharing to other social networks:
I don't currently know of any way to stop readers sharing your blog to any other social networks (Facebook Twitter, LinkedIn, YouTube, etc).
However, the other networks are more about sharing your status, and less about sharing other people's creations. If you have privacy concerns that make you want to stop people there from sharing "your" content, then the best approach is probably to just not post the material to the internet at all.
But if you do know ways to stop sharing, I'd love to hear about them.
Related Articles:
How to edit your Blogger template
Copyright, blogs and bloggers - tools for applying copyright protection to your blog
Linking your blog and the social networks
Putting "share this on Facebook" etc buttons into your blog
Putting a Tweet-this-quote link in blog posts
This article shows you how to apply a "tweet this" label to a specific quote in a blog-post, and how this works for your readers.
What are "tweet this" links
Previously I've described how to put a "tweet this" button into your blog.
This can be set up to let readers share the specific post they're reading, or your entire blog (but not both at the same time).
It's an example of the "look what he said" approach to social networking.
Recently, it's become popular to invite readers to tweet a specific sentence or section of a post, by putting a "tweet this" link at the end of the section, like this
Blogger-Tyrant has described how to do this, and suggested Click to Tweet, a 3rd party tool which makes it a tiny bit easier by generating the HTML code for you.
However I'm not fond of 3rd party tools that give you code that refers back to their own servers (eg Click to Tweet gives back a link likethis: http://clicktotweet.com/wa95i): if C2T goes out of business, there would be broken links on my blog, even if it and Twitter were both working normally. So I'm not recommending Click-to-Tweet.
But this feature has a lot of potential, if we use it properly. It's not hard, as I've explained below. But it does have certain things to be aware of - including a need to stay well away from quote marks - see the Troubleshooting notes for more about this.
How to set up a "tweet this" link:
1 Copy this code:
2 Edit your post or page, and go to the edit HTML view.
3 Find the place where you want to put the link.
(Hint: in compose-mode, put in some text that wouldn't otherwise be used, eg XXXX. Then use the browser search feature to find that text in Edit HTML mode.)
4 Paste in the code.
5 Replace both instances of TEXT-YOU-WANT-TWEETED with the words that you are inviting your readers to share on Twitter.
See the Troubleshooting section below, for things to be aware of as you do this.
6 Replace YOUR-BLOGGER-ACCOUNT with your own Twitter account-name.
If you don't have an account, or don't want it associated with the tweet, remove all of via @YOUR-BLOGGER-ACCOUNT
7 If you want tweeting to take readers away from your blog, remove the target="_blank" part of the code. Otherwise leave it alone: with it there, Twitter will open in a new tab or window.
8 Make any other changes, including indenting or formatting the part you want quoted.
You can change the "[tweet this]" phrase that's just before the </a> to any other words you would like to use, eg "[share on twitter]", "[tweet me]", "[tweet this quote]", "[cheep, cheep]" etc. The square brackets are optional - I like them because they make the bit-to-quote look different from the action instruction.
9 When you are ready, publish the post, and test the tweet-this link, just to be sure it's working.
 Troubleshooting:
What happens for your readers:
When a visitor reads sees your post, they see
The [Tweet this] part will also have whatever formatting is applied to links in your template.
When they click on the [Tweet this] link:

Once they've clicked the Tweet button, they are returned to Twitter's main window. (The target="_blank" in the code means they will still have your blog open in another window too.)
Over in the Twitter-stream, their followers will see a message with your suggested text, saying that it came via your Twitter account (unless you removed the "via" bit).
A final thought: watch what you tweet.
Notice that there are two places where you had to change TEXT-YOU-WANT-TWEETED. Most people will follow the instructions and, changed both of them to the same thing.
But there's no way to enforce this, and it's not immediately obvious if a blogger hasn't. Look at this example:
It looks harmless enough. But if you click the [Tweet this quote] link, the text that is suggested is
Suggestions:
What else?
I have a feeling that the tweet-this-quote feature, which is based on suggesting a value to Twitter via the URL it is called with, could be used in some interesting ways - keen to hear any suggestions that you might have.
Related Articles:
Adding an official Tweet this button to your blog
How to link blogs and the social networks
Foormatting your links
What are "tweet this" links
 |
| Male Blackbird - By Malene Thyssen (User:Malene) [GFDL (www.gnu.org/copyleft/fdl.html) or CC-BY-SA-2.5 (www.creativecommons.org/licenses/by-sa/2.5)] via Wikimedia Commons |
This can be set up to let readers share the specific post they're reading, or your entire blog (but not both at the same time).
It's an example of the "look what he said" approach to social networking.
Recently, it's become popular to invite readers to tweet a specific sentence or section of a post, by putting a "tweet this" link at the end of the section, like this
Here is a cool quote from me, which I think you should share. [tweet this]
Blogger-Tyrant has described how to do this, and suggested Click to Tweet, a 3rd party tool which makes it a tiny bit easier by generating the HTML code for you.
However I'm not fond of 3rd party tools that give you code that refers back to their own servers (eg Click to Tweet gives back a link likethis: http://clicktotweet.com/wa95i): if C2T goes out of business, there would be broken links on my blog, even if it and Twitter were both working normally. So I'm not recommending Click-to-Tweet.
But this feature has a lot of potential, if we use it properly. It's not hard, as I've explained below. But it does have certain things to be aware of - including a need to stay well away from quote marks - see the Troubleshooting notes for more about this.
How to set up a "tweet this" link:
1 Copy this code:
TEXT-YOU-WANT-TWEETED <a href="http://twitter.com/home/?status= TEXT-YOU-WANT-TWEETED. via@YOUR-BLOGGER-ACCOUNT " target="_blank"> [tweet this].</a>
2 Edit your post or page, and go to the edit HTML view.
3 Find the place where you want to put the link.
(Hint: in compose-mode, put in some text that wouldn't otherwise be used, eg XXXX. Then use the browser search feature to find that text in Edit HTML mode.)
4 Paste in the code.
5 Replace both instances of TEXT-YOU-WANT-TWEETED with the words that you are inviting your readers to share on Twitter.
See the Troubleshooting section below, for things to be aware of as you do this.
6 Replace YOUR-BLOGGER-ACCOUNT with your own Twitter account-name.
If you don't have an account, or don't want it associated with the tweet, remove all of via @YOUR-BLOGGER-ACCOUNT
7 If you want tweeting to take readers away from your blog, remove the target="_blank" part of the code. Otherwise leave it alone: with it there, Twitter will open in a new tab or window.
8 Make any other changes, including indenting or formatting the part you want quoted.
You can change the "[tweet this]" phrase that's just before the </a> to any other words you would like to use, eg "[share on twitter]", "[tweet me]", "[tweet this quote]", "[cheep, cheep]" etc. The square brackets are optional - I like them because they make the bit-to-quote look different from the action instruction.
9 When you are ready, publish the post, and test the tweet-this link, just to be sure it's working.

- Don't mess with the quote marks around the text: replace just TEXT-YOU-WANT-TWEETED - not the stuff around it.
- You cannot have ANY quote marks (single or double, ' or " ) or apostrophe's or hashes ("#/"'s) inside the text-you-want-tweeted. Some other punctuation seems to be ok (though I haven't tested every option)
- Make sure there are no spaces between "status=" and "TEXT-YOU-WANT-TWEETED"
- Don't try using #hashtags. They don't break the code, but they do seem to truncate what gets put into your suggested message.
- If you use quotes or apostrophe's in by accident, and publish or go back to compose mode before you realise, the best way to fix it is to remove the whole section and start again: quotes inside quotes make Blogger's post-editor very confused.
What happens for your readers:
When a visitor reads sees your post, they see
TEXT-YOU-WANT-TWEETED [tweet this].with whatever formatting you used (eg, I put in the indenting and coloured background on the quote above).
The [Tweet this] part will also have whatever formatting is applied to links in your template.
When they click on the [Tweet this] link:
- If they are logged in to Twitter at the time, then they will go to Twitter's status-update option in a new window or tab, and your suggested message will there, waiting for them to press the Tweet button.
- If they are not logged in to Twitter at the time, a new window or tab will open, and they will be asked to log in to www.twitter.com.
After they have logged in, they will go to Twitter's status-update option, and your suggested message will there, waiting for them to press the Tweet button.

Once they've clicked the Tweet button, they are returned to Twitter's main window. (The target="_blank" in the code means they will still have your blog open in another window too.)
Over in the Twitter-stream, their followers will see a message with your suggested text, saying that it came via your Twitter account (unless you removed the "via" bit).
A final thought: watch what you tweet.
Notice that there are two places where you had to change TEXT-YOU-WANT-TWEETED. Most people will follow the instructions and, changed both of them to the same thing.
But there's no way to enforce this, and it's not immediately obvious if a blogger hasn't. Look at this example:
Happy St Patricks Day [tweet this]
It looks harmless enough. But if you click the [Tweet this quote] link, the text that is suggested is
Im a plastic paddy.which might not be quite the message your readers want to send. Some will notice, and not send the tweet. But others will just hit the Tweet button without properly looking at what you've suggested that they quote. This could be embarrassing, at least, and could be an excellent way to lose your audience.
Suggestions:
- If you've a Blogger who has worked hard to earn your reader's trust, don't lose it by trying to fool them like this.
- If you click the a tweet-this-quote link anywhere, make sure you double-check what is suggested, before hitting the Tweet button over in Twitter.
What else?
I have a feeling that the tweet-this-quote feature, which is based on suggesting a value to Twitter via the URL it is called with, could be used in some interesting ways - keen to hear any suggestions that you might have.
Related Articles:
Adding an official Tweet this button to your blog
How to link blogs and the social networks
Foormatting your links
AdSense for Domains is discontinued
/
Sunday, March 11, 2012 /
Posted in
Adsense,
Domain management,
from Blogger-HAT Lite,
Quick-tips
AdSense have decided to stop offering AdSense for Domains - a product that let domain owners show AdSense ads when someone tried to visit a URL that's not currently pointing to any website. (Because, of
course, they cannot use regular AdSense for Content ads on URL like this because the Terms and Conditions say it can only be shown on websites that actually have "real" content.)
There hasn't beean a public announcement (that I've seen), but AdSense publishers who are currently using AdSense for Domains have been getting individual emails about the change, which has these timeframes:
They also say that: "going forward, undeveloped domains will only be served through our existing AdSense for Domains distribution network" - but I haven't yet been able to work out exactly what this means.
To continue monetizing existing undeveloped domains, we need to migrate them to a new domain parking provider - so I'm looking for recommendations for these at present.
There is a Migration Guide: to help people move existing Domains monetized through AdSense to other places here: http://www.google.com/appserve/mkt/5pn7W99IR8ElM3.
For more information see the Help Center: http://www.google.com/appserve/mkt/DhXnVfFp9Ihuw4.
course, they cannot use regular AdSense for Content ads on URL like this because the Terms and Conditions say it can only be shown on websites that actually have "real" content.)
There hasn't beean a public announcement (that I've seen), but AdSense publishers who are currently using AdSense for Domains have been getting individual emails about the change, which has these timeframes:
- March 21: Cannot put AdSense on any new Hosted domains
- April 18: Existing hosted domains will become inactive and AdSense advertising won't be displayed when someone looks at them.
- June 27: Hosted domains will no longer be available in AdSense accounts (Meaning we need to have downloaded any necessary information about them before then).
They also say that: "going forward, undeveloped domains will only be served through our existing AdSense for Domains distribution network" - but I haven't yet been able to work out exactly what this means.
To continue monetizing existing undeveloped domains, we need to migrate them to a new domain parking provider - so I'm looking for recommendations for these at present.
There is a Migration Guide: to help people move existing Domains monetized through AdSense to other places here: http://www.google.com/appserve/mkt/5pn7W99IR8ElM3.
For more information see the Help Center: http://www.google.com/appserve/mkt/DhXnVfFp9Ihuw4.
Sharing Google Analytics reports with other people
/
Friday, March 9, 2012 /
Posted in
Analytics,
from Blogger-HAT Lite,
Quick-tips
Google Analytics has added a Share button to
This a way to let you share reports etc that you've designed: it works by giving you an URL that you can email or publish in a blog-post.
When someone clicks on this URL, they go into Analytics, and a custom report - which is just like yours at the time you clicked Share and created the URL - is added to their own dashboard.
Effectively, what the other person sees is:
Analytics is hugely powerful, with far more features than your average blogger needs. Some blogger-helpers don't recommend it, just because it's so large (a bit like using Microsoft Word to edit a text file).
But it has a number of advantages over Blogger's built in Stats (including counts not being reset to zero every time that you edit and publish a post with an updated date/time - which is the way I give one of my blogs a home page).
It seems to me that this share-your-analytics-design feature opens up a large opportunity for people who really understand how Analytics works to help the rest of us find actionable information about what's happening on our blogs. Do you know any Analytics gurus worth following?
- Custom Reports: (Actions menu on the table that lists your reports)
- The dashboard: (top-left corner)
- Advanced Segments: (Admin tab > Advanced Segments)
This a way to let you share reports etc that you've designed: it works by giving you an URL that you can email or publish in a blog-post.
When someone clicks on this URL, they go into Analytics, and a custom report - which is just like yours at the time you clicked Share and created the URL - is added to their own dashboard.
Effectively, what the other person sees is:
- your report structure
- showing their data
Analytics is hugely powerful, with far more features than your average blogger needs. Some blogger-helpers don't recommend it, just because it's so large (a bit like using Microsoft Word to edit a text file).
But it has a number of advantages over Blogger's built in Stats (including counts not being reset to zero every time that you edit and publish a post with an updated date/time - which is the way I give one of my blogs a home page).
It seems to me that this share-your-analytics-design feature opens up a large opportunity for people who really understand how Analytics works to help the rest of us find actionable information about what's happening on our blogs. Do you know any Analytics gurus worth following?
Blogger Help Forum (English) is moving
/
Tuesday, March 6, 2012 /
Posted in
Blogger Help Forum,
from Blogger-HAT Lite,
Quick-tips
The English-language Blogger Help Forum (BHF) is moving to a new Google Product Forum, based Google Groups, from 9 March 2012 (that's this Friday).
There's nothing about the change in Blogger Buzz, but they've posted a long announcement in the current BHF, and linked to a Getting Started Guide which shows the base features of Google Product Forums, and an example working GPF-based forum (the one for Google Plus).
Key facts about the change:
There's nothing about the change in Blogger Buzz, but they've posted a long announcement in the current BHF, and linked to a Getting Started Guide which shows the base features of Google Product Forums, and an example working GPF-based forum (the one for Google Plus).
Key facts about the change:
- Posts from the current forum will not be moved into to the new forum (since most of them refer to the old Blogger interface).
- You will need to join Google Groups to use it.
- All user levels will reset to Level 1 (presuming not TCs though) - but if they look to make more TCs, your post-history in the old BHF will be checked.
- The only way to get a picture with your profile in the new forum is to have it linked to your Google + account. (I tested with an account that's not +'d, these do basic Google profiles that don't include pictures).
- The existing BHF will be archived, so the current content can still be found.
(Not sure what "archived" means - probably that write-access to it will be turned off, but read-only access will be continued). - All help-links inside Blogger will go to the new forum, once it's live.
- The new forum will be at: https://groups.google.com/a/googleproductforums.com/forum/#!forum/blogger
One fantastic feature of the new forum is the keyboard shortcuts, eg "space" to move down a page. (Bringing back fond memories of the first use-net reader I ever met, back in the days of Vax VMS :-)
Adding a gadget to your blog, using Blogger's WYSIWYG interface
/
Monday, March 5, 2012 /
Posted in
Article,
Blog layout,
Gadgets
This article shows how to use Blogger's add-a-gadget tool. It also looks at how you can move a gadget around in your blog, and describes what you can do with some of Blogger's most-popular gadgets.
 Previously, I've explained what gadgets (ie widget) are, and the advantages and disadvantages of each method of adding one to your blog, and how to add a gadget to a blog with a dynamic-view template.
This artile looks at the details of using Blogger's own add-a-gadget tool, how exactly to use it, and how to change the placement of gadgets in your blog.
This is more in-depth than the dynamic templates article, and applies mainly to blogs with layout and designer templates. The same general approach is used for dynamic template blogs, but they do have some features that aren't discussed here (eg a limited range of gadgets that actually work).
Also, there are reasons why you might prefer to get the HTML-code for a gadget, and install it like you install any other code to your blog. Read more about the reasons for using HTML-gadgets and places to get code that's equivalent to Blogger's official gadgets.
OR
In pre-Sept-2011-Blogger (ie the old UI): go to the Design > Page elements tab
The Add a Gadget links on the screen shows you all the places that you can currently add a gadget. Choose which place to add one to to.
(You can make it possible to add gadgets to other places see How to add a gadget above your header, or Adding a new footer section to your template for ideas on how to do this.)

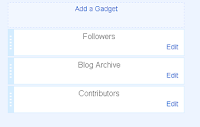
Click the Add a gadget link at the top of the area you choose.
 The format of the Choose-a-gadget that opens is being updated to the look like new interface.
I suspect it's not quite finished yet, so the it may look a little different to what's shown in this picture.
But the main contents should be the same.
Choose a gadget from the list, or one of the tabs:
 beside the name.

This opens the gadget configuration screen, where you enter the details of how you want the gadget to work.
Every gadget needs different details.
For example, in the Popular Posts gadget, you must choose
When you have entered the parameters, click Save.
This takes you back to the blog-layout screen. The new gadget is at the top of the list of gadgets in the area where you put it. If you gave it a title, then this will show up. But if you left the title blank, the screen just shows the gadget type.

Use the Preview button to see what the front page of your blog will look like with the gadget added.
Change the position of the gadget if you want to (see the next section if you need help with this).
Once you are happy with the gadget and its position, click Save to apply it to your blog.
Once you are happy with the position of all the gadget, click Save (in the old Blogger) or Save arrangement (new Blogger) to apply the new places to your blog.
There are other things that you can do with gadget, too, including only show them on the Home-page, and making a gadget that looks like a post.
Showing a gadget on the home page only
How to edit your blog's template
Options for adding gadgets to your blog
Adding a gadget above your header
Adding a new footer section to your template
Gadgets and types of Blogger template
This artile looks at the details of using Blogger's own add-a-gadget tool, how exactly to use it, and how to change the placement of gadgets in your blog.
This is more in-depth than the dynamic templates article, and applies mainly to blogs with layout and designer templates. The same general approach is used for dynamic template blogs, but they do have some features that aren't discussed here (eg a limited range of gadgets that actually work).
In-post, and HTML-code gadget:
The tool described here lets you put a gadget in any of the "gadget areas" in your blog. The options are a little different if you want to put a gadget right inside a blog-post.Also, there are reasons why you might prefer to get the HTML-code for a gadget, and install it like you install any other code to your blog. Read more about the reasons for using HTML-gadgets and places to get code that's equivalent to Blogger's official gadgets.
How to use Blogger's Add-a-gadget feature
In post-Sept-2011-Blogger (ie the new UI): go to the Layout tabOR
In pre-Sept-2011-Blogger (ie the old UI): go to the Design > Page elements tab
The Add a Gadget links on the screen shows you all the places that you can currently add a gadget. Choose which place to add one to to.
(You can make it possible to add gadgets to other places see How to add a gadget above your header, or Adding a new footer section to your template for ideas on how to do this.)

Click the Add a gadget link at the top of the area you choose.

I suspect it's not quite finished yet, so the it may look a little different to what's shown in this picture.
But the main contents should be the same.
Choose a gadget from the list, or one of the tabs:
- You may need to scroll down the list to find the one you need.
- Do not use the search tool in the list to find the gadget that you want - it sometimes doesn't work correctly and only shows gadget from 3rd parties and not the official ones from Blogger.
- Every gadget in the list has a source: some are from Blogger.com. Some are from other recognised companies (eg Amazon.com), But some are from individuals, just like you and me. The danger with using a 3rd party gadget from this list is that you have no way of looking at the code behind it, so you cannot decide if it's safe or not.
I recommend only choosing gadgets from Blogger.com, or other well known companies.
beside the name.
This opens the gadget configuration screen, where you enter the details of how you want the gadget to work.
Every gadget needs different details.
For example, in the Popular Posts gadget, you must choose
- to list popular posts since statistics started, or the last 7 or 30 days
- whether to show the image thumbnail
- whether to show the post snippet
- how many posts to show
When you have entered the parameters, click Save.
This takes you back to the blog-layout screen. The new gadget is at the top of the list of gadgets in the area where you put it. If you gave it a title, then this will show up. But if you left the title blank, the screen just shows the gadget type.

Use the Preview button to see what the front page of your blog will look like with the gadget added.
Change the position of the gadget if you want to (see the next section if you need help with this).
Once you are happy with the gadget and its position, click Save to apply it to your blog.
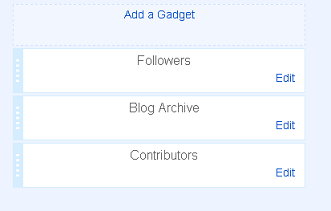
How to change the position of a gadget:
You can move a gadget (new or existing) into any place in your blog-layout that you can add a gadget to. In the Layout (Design > Page elements) screen:- Single-click on the gadget and hold the mouse button down. Keep holding it down.
- Dragging the mouse moves the gadget to other places, including further down the list of gadgets currently in that space, or into a totally different part of the blog.
- Once the gadget is in the place where you want it to be, let go of the mouse-button.
Once you are happy with the position of all the gadget, click Save (in the old Blogger) or Save arrangement (new Blogger) to apply the new places to your blog.
There are other things that you can do with gadget, too, including only show them on the Home-page, and making a gadget that looks like a post.
What can Blogger's gadgets be used for
Some of the most popular gadgets provided by Blogger are:| Labels | Lets your readers pick a category and see a list of posts from your blog with that category. |
| Popular posts | Shows the most-frequently read posts from your blog |
| Pages | Similar to Labels and the linked-list gadget, this one can show a list of either Pages from your blog or external sources, and it can also be used to make a menu bar for your blog |
| Blogroll | Highlights other blogs that you follow |
| Picture | Shows a picture, of your choice, which can link to somewhere as well. |
| RSS | Displays the last few posts from an RSS feed - this can be any feed that you choose - not just your own one. |
| HTML/Javascript | Lets you add code that came from a 3rd party, or that you wrote yourself, without having to edit your template. |
| Link List | A general-purpose gadget for adding a list of web-sites and blog pages, either inside or outside your blog. |
Related Articles:
Showing a gadget on the home page only
How to edit your blog's template
Options for adding gadgets to your blog
Adding a gadget above your header
Adding a new footer section to your template

